About Print Template Creator in PTBooth A1 PLUS
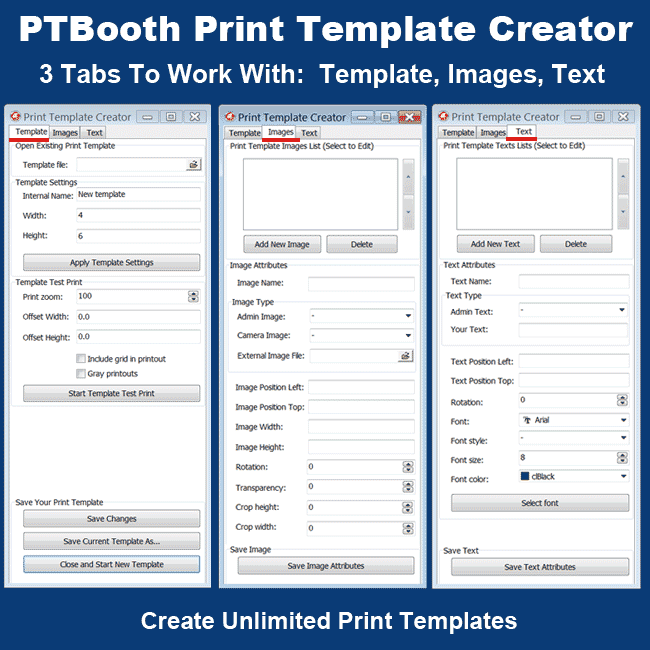
PTBooth Print Template Creator allows you to create custom print template layouts for any media size (4x6, 5x7, 8x10 etc.) and as many print templates as you want.
PTBooth Print Template Creator will come in handy if you want to offer a more unique photo printing layout and design for your customers.
For example you can create different themes that relate to the type of event you are providing the photo booth for by laying in different artwork images, logos, and image layout design.
READ: Custom Print Templates in PTBooth - Examples from PTBooth owners
Print Template Creator Explained
READ How To Use Transparent/External Images in Print Template
Creating a basic photostrip Print Template
Start New Print Template
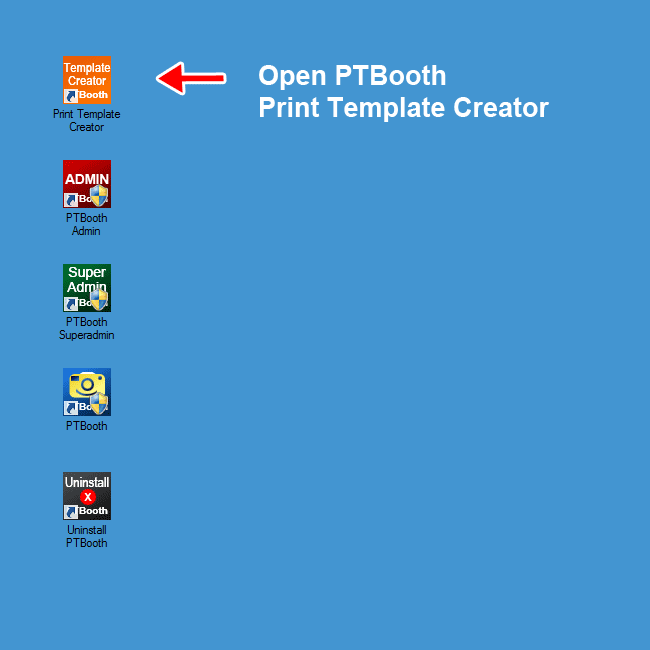
Open PTBooth Print Template Creator
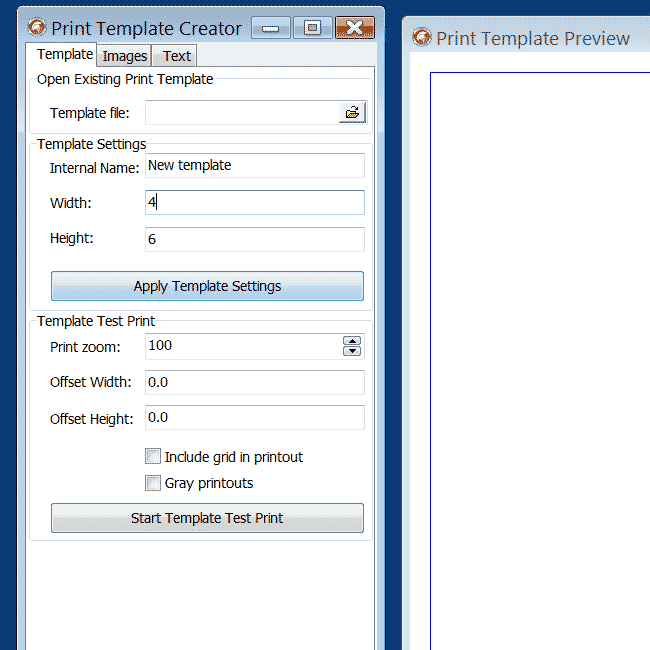
In Template Tab set your print template size.
In this tutorial it will be 4x6 Portrait layout.
Save Your Print Template
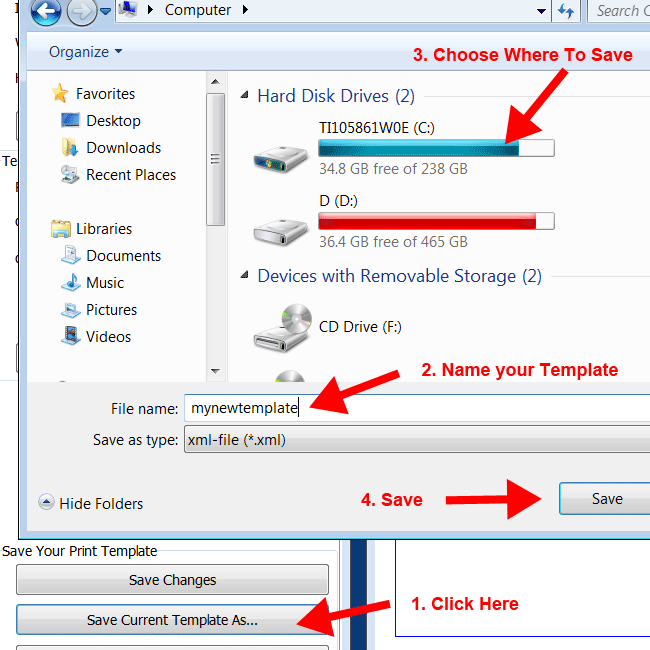
In Teplate Tab after you set your print template size click on "Save Current Template As..." button.
A "Save As" window will open.
Name your Print Template and choose the location on your computer where you want to save your Print Template.
Click "Save"
Add New Image
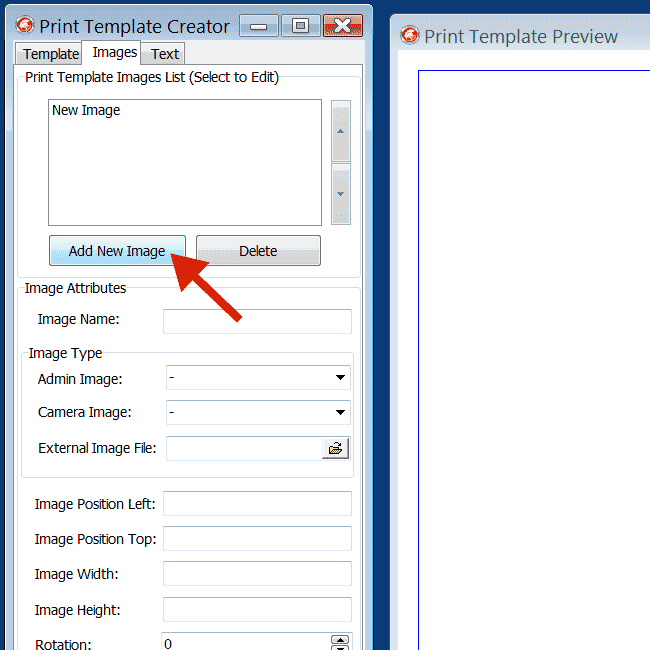
Switch to Images Tab
Click on "Add New Image" button.
Edit New Image
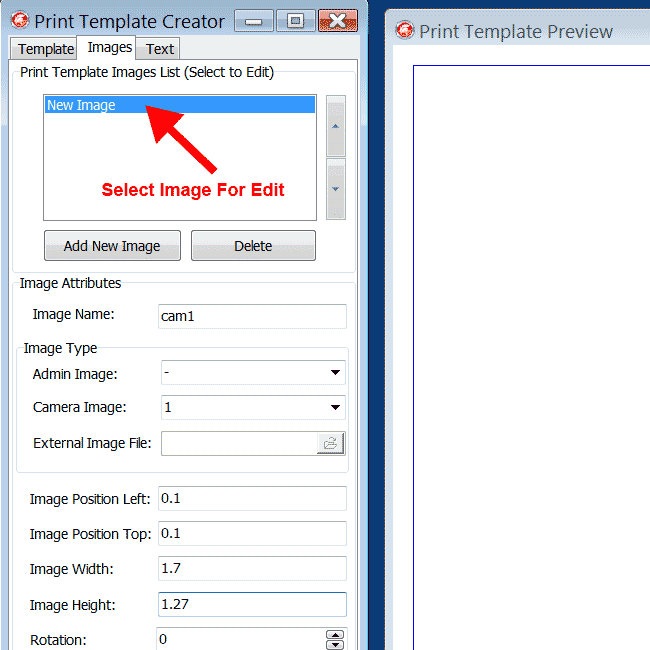
Select New Image in the Print Template Images List box.
When image is selected it will be highlighted in blue
Save Image
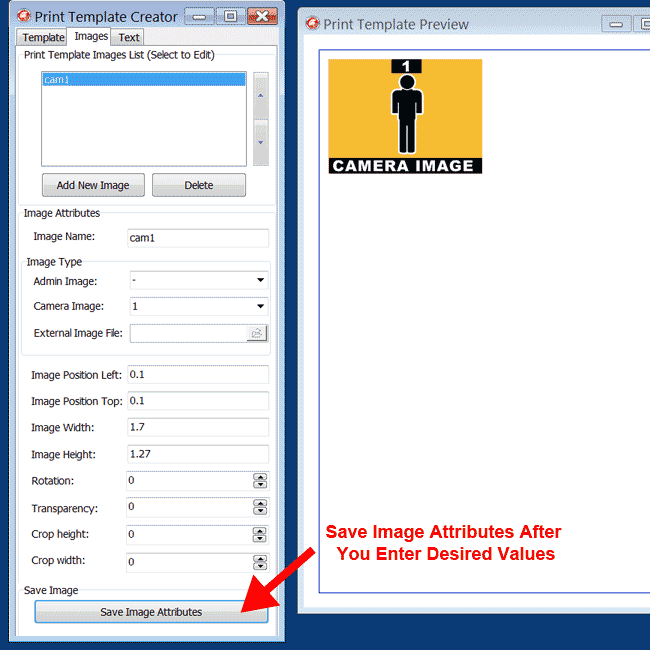
Set all Image Attributes
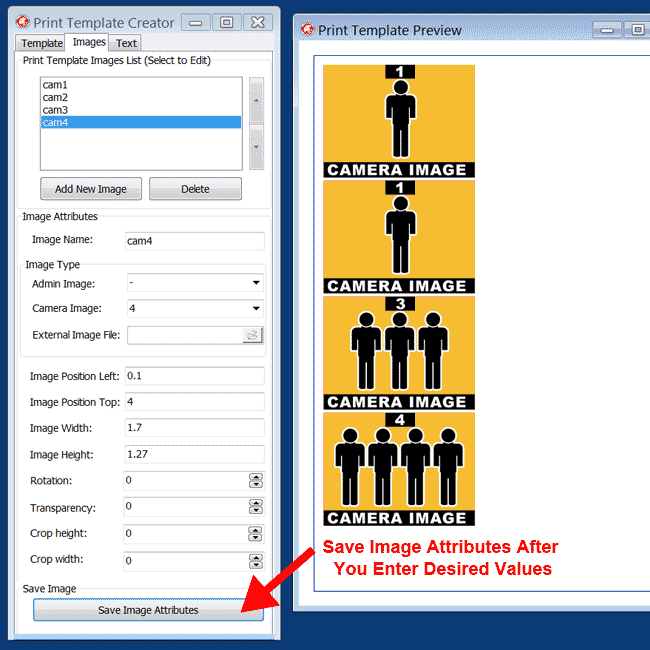
Click "Save Image Attributes" in order to apply and save attributes for that particular Image.
This is our first camera image that will be taken during the photo session.
"Save Image Attributes" button can be clicked on at anytime to save your image attributes so you can immediatelly see the results of your changes in the print template preview window.
Add The Rest of The Camera Images
Repeat Adding Images
Don't forget to click "Save Image Attributes" after you set all Image Attributes for each Camera Image.
"Save Image Attributes" button can be clicked on at anytime to save your image attributes so you can immediatelly see the results of your changes in the print template preview window.
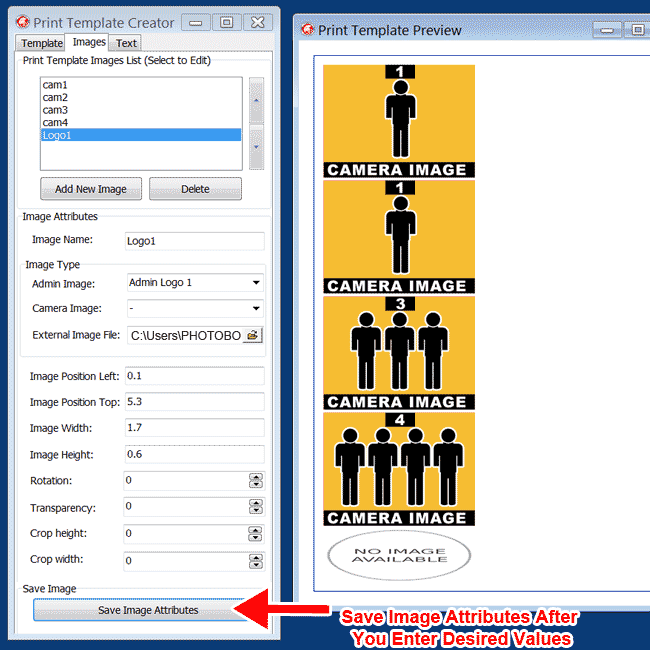
Add Logo Image
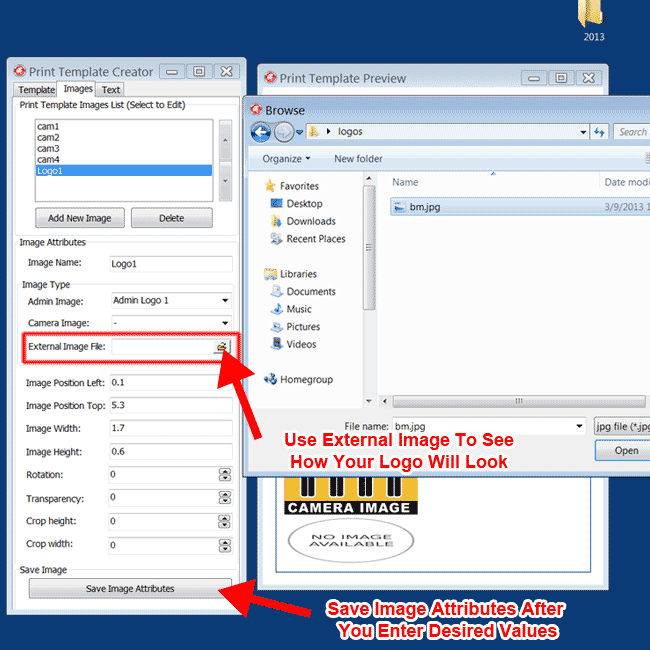
Use External Image To See Logo
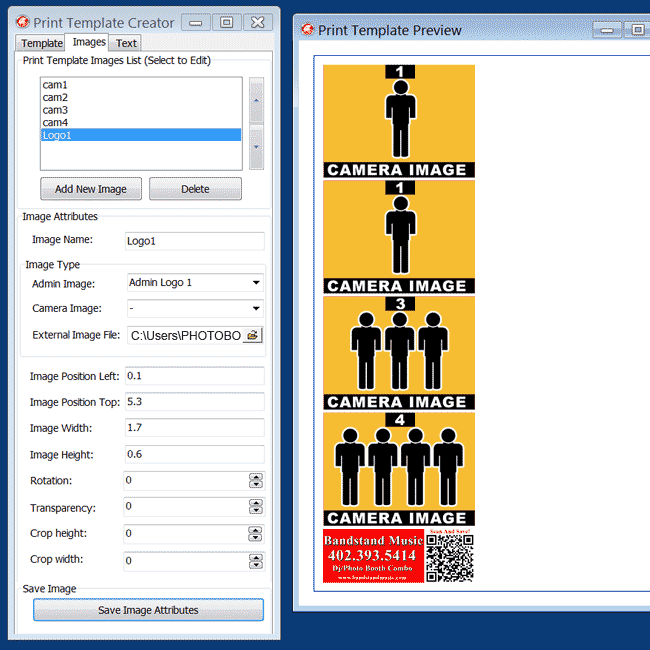
If you want to see how your logo will look use the External image file to temporarily substitute your Admin Logo 1 with a logo image that you have prepared.
Now you can see how it will appear in your print template.
Any external image assigned to Admin images will not show up during the usage of your print template.
It will only be visible in your Template Creator and is used for testing purposes only.
Add Text
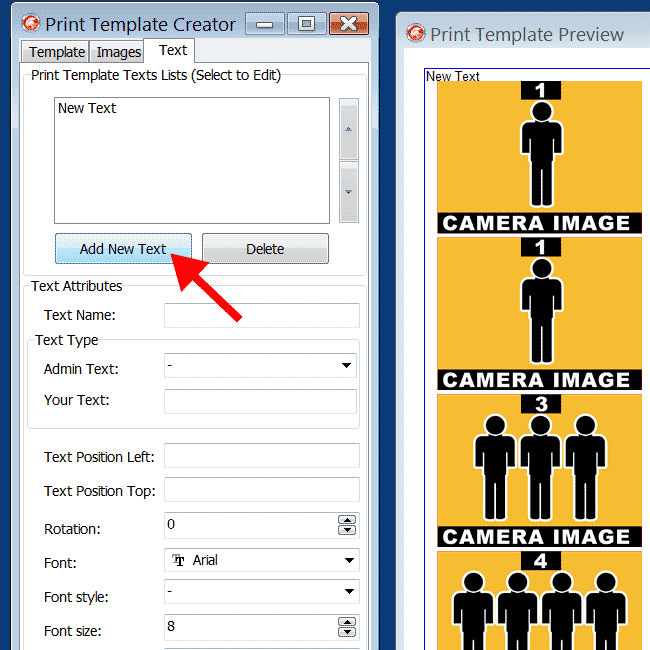
Switch to Text Tab
Click on "Add New Text" button.
Edit Text
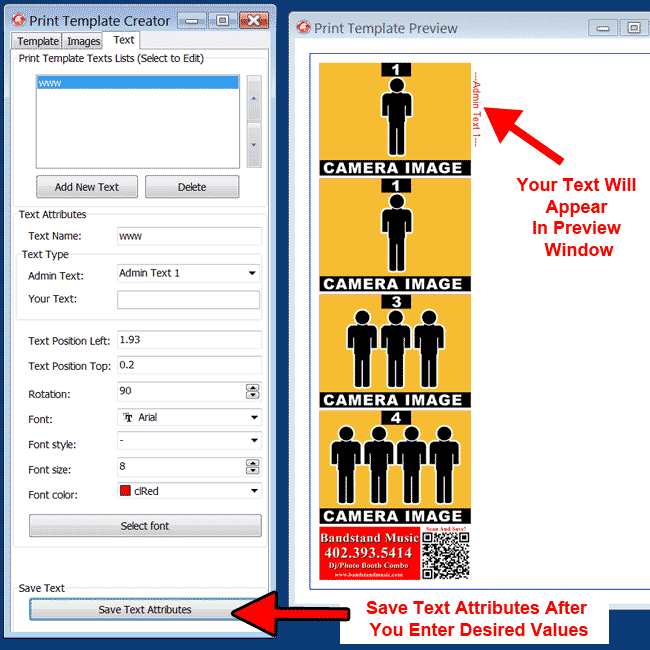
Select New Text in the Print Template Text List box. When Text is selected it will be highlighted in blue
Set your Text attributes
Click "Save Text Attributes" in order to apply and save attributes for that particular Text.
"Save Text Attributes" can be clicked on at anytime to save your text attributes so you can see the results of your changes in the print template preview window
Add Take #
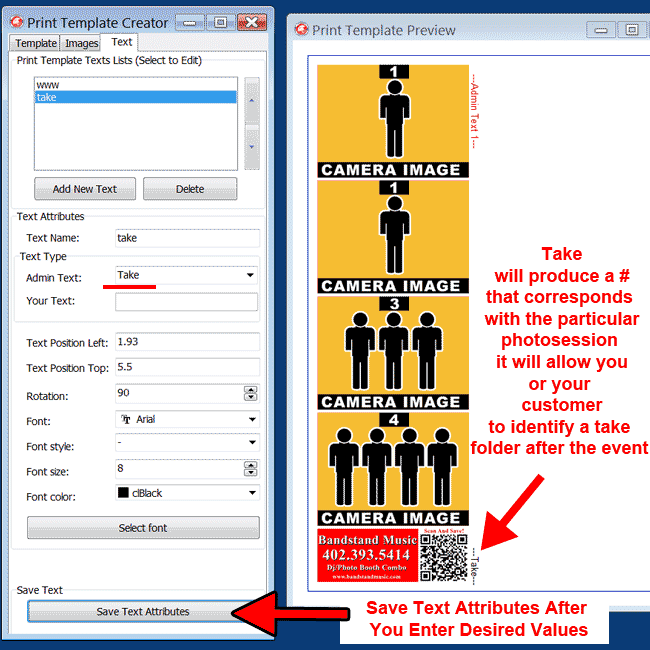
Add New Text and designate that text as Admin Text: Take.
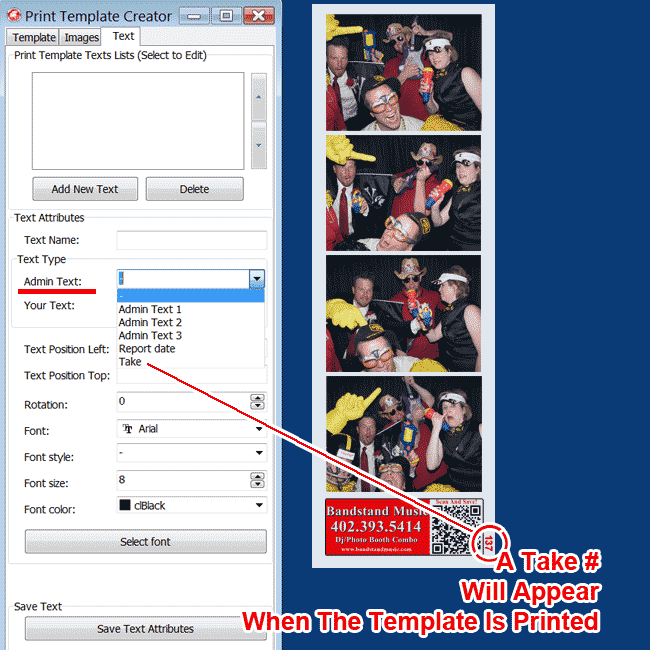
The Take parameter of the Admin Text selection will produce a # that will correspond with the Take number of the particular photosession.
Add The Rest Of The Images And Text And Save Your Template
Repeat all actions above to add the second half of the photostrip if needed.
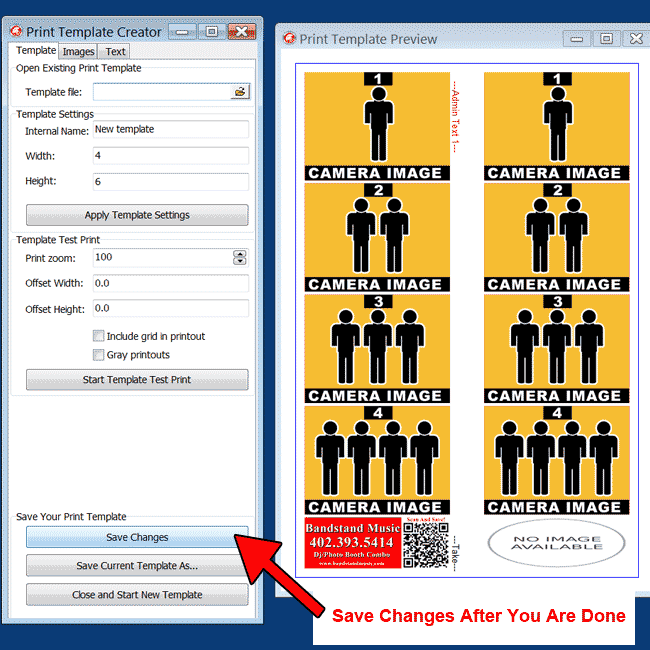
Switch to TEMPLATE TAB and click "Save Changes"
Photostrip Print Template Created.
PTBooth Print Template Creator will come in handy if you want to offer a more unique photo printing layout and design for your customers.
For example you can create different themes that relate to the type of event you are providing the photo booth for by laying in different artwork images, logos, and image layout design.
READ: Custom Print Templates in PTBooth - Examples from PTBooth owners
Print Template Creator Explained
READ How To Use Transparent/External Images in Print Template

Creating a basic photostrip Print Template
Start New Print Template
Open PTBooth Print Template Creator
In Template Tab set your print template size.
In this tutorial it will be 4x6 Portrait layout.


Save Your Print Template
In Teplate Tab after you set your print template size click on "Save Current Template As..." button.
A "Save As" window will open.
Name your Print Template and choose the location on your computer where you want to save your Print Template.
Click "Save"

Add New Image
Switch to Images Tab
Click on "Add New Image" button.

Edit New Image
Select New Image in the Print Template Images List box.
When image is selected it will be highlighted in blue

Save Image
Set all Image Attributes
Click "Save Image Attributes" in order to apply and save attributes for that particular Image.
This is our first camera image that will be taken during the photo session.
"Save Image Attributes" button can be clicked on at anytime to save your image attributes so you can immediatelly see the results of your changes in the print template preview window.

Add The Rest of The Camera Images
Repeat Adding Images
Don't forget to click "Save Image Attributes" after you set all Image Attributes for each Camera Image.
"Save Image Attributes" button can be clicked on at anytime to save your image attributes so you can immediatelly see the results of your changes in the print template preview window.

Add Logo Image

Use External Image To See Logo
If you want to see how your logo will look use the External image file to temporarily substitute your Admin Logo 1 with a logo image that you have prepared.
Now you can see how it will appear in your print template.
Any external image assigned to Admin images will not show up during the usage of your print template.
It will only be visible in your Template Creator and is used for testing purposes only.


Add Text
Switch to Text Tab
Click on "Add New Text" button.

Edit Text
Select New Text in the Print Template Text List box. When Text is selected it will be highlighted in blue
Set your Text attributes
Click "Save Text Attributes" in order to apply and save attributes for that particular Text.
"Save Text Attributes" can be clicked on at anytime to save your text attributes so you can see the results of your changes in the print template preview window

Add Take #
Add New Text and designate that text as Admin Text: Take.
The Take parameter of the Admin Text selection will produce a # that will correspond with the Take number of the particular photosession.


Add The Rest Of The Images And Text And Save Your Template
Repeat all actions above to add the second half of the photostrip if needed.
Switch to TEMPLATE TAB and click "Save Changes"
Photostrip Print Template Created.

