Using a Webcamera with PTBooth A1 PLUS
THE WEBCAMERA CAN BE USED TO TAKE PHOTOS AND RECORD VIDEOS.You will be able to record HD video and audio if your webcamera is capable of recording in HD format.
We recommend using the Logitech C920 webcamera for your Photo Booth. The Logitech C920 webcamera is capable of recording HD video (1080p) and has a built-in video compressor that will deliver a high quality video with a very small file size.
When it comes to the camera source, the PTBooth A1 PLUS software provides you with the following choices:
- 1. Use a Webcamera only as your primary camera to take photos
- 2. Use a Webcamera only as your primary camera to take photos and record videos
- 3. Use a Canon camera as your primary camera to take photos and your Webcamera to record video
- 4. Use a Canon camera only as your primary camera to take photos
IN THIS TUTORIAL we will show you HOW TO SETUP YOUR WEBCAMERA AS YOUR PRIMARY CAMERA TO RECORD VIDEO.
Quick overview:
- ENABLE WEBCAMERA FOR VIDEO RECORDING
- Select Video Booth Only Mode
- Specify Your Camera Source: Webcamera only
- Specify Video Recording Time values
- SET VIDEO RECORDING SETTINGS
- Choose the desired webcam from the dropdown list
- Set the desired Video Resolution
- Choose Your Video Compression
- Set the Compression type and Video format
- SET AUDIO RECORDING SETTINGS
- Select the desired microphone from the dropdown list
- Set desired Microphone Master Volume
- Set the desired Audio Normalization: Peak normalization and Gain
- Select Audio Compressor
- PERFORM VIDEO RECORDING TEST
SETUP Webcamera Settings To Record Video
Connect your Webcamera and make sure Windows recognizes it
Please check your webcamera manuals. Some webcameras require original drivers to be installed.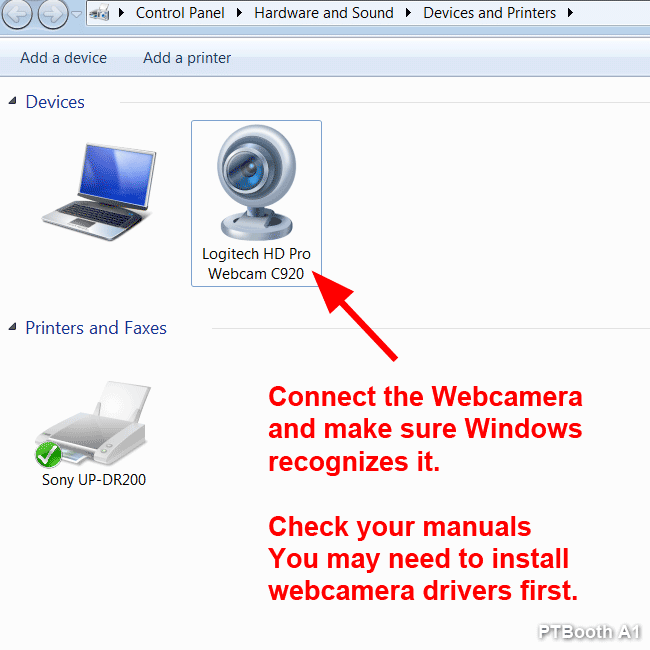
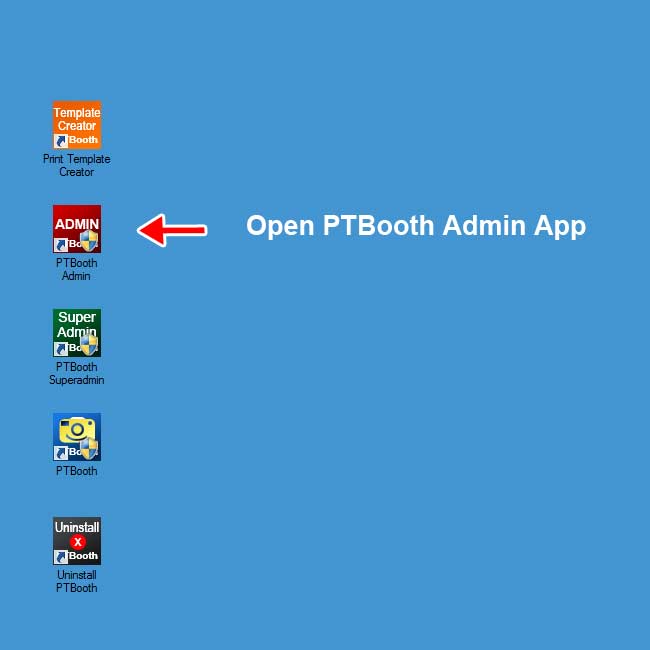
Open The PTBooth Admin
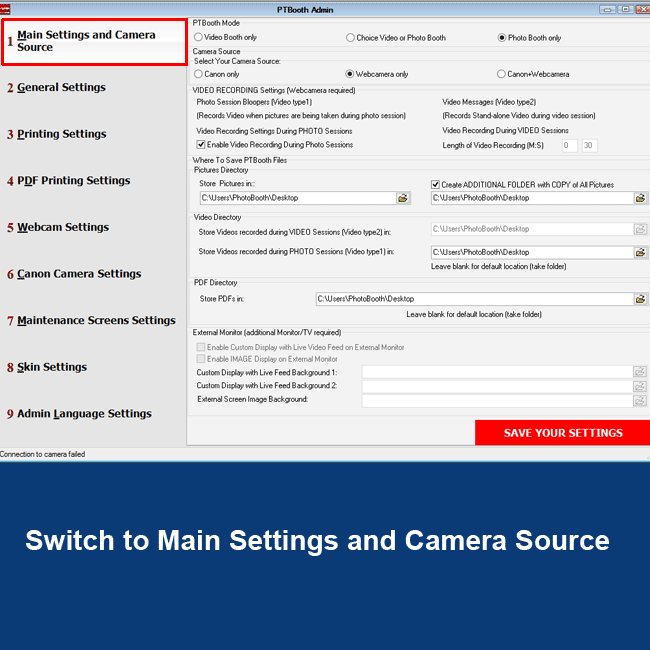
Switch to Main Settings and Camera Source Tab
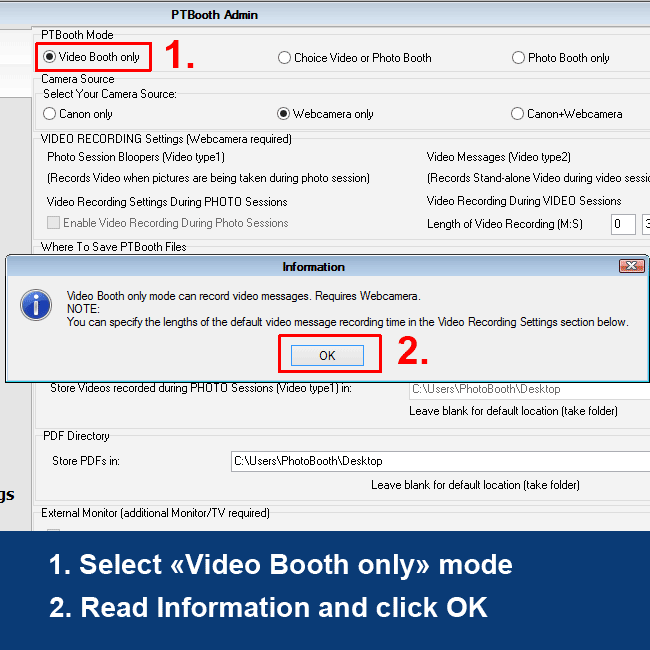
Select Video Booth Only Mode
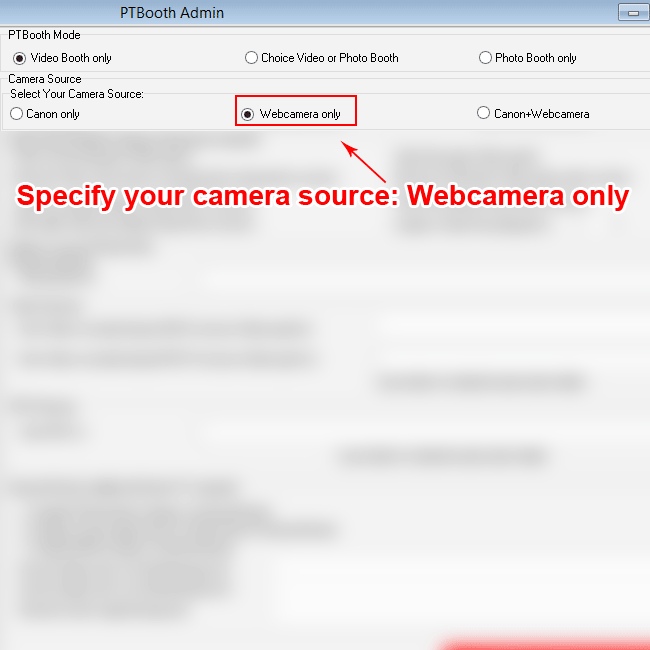
Specify Your Camera Source: Webcamera only
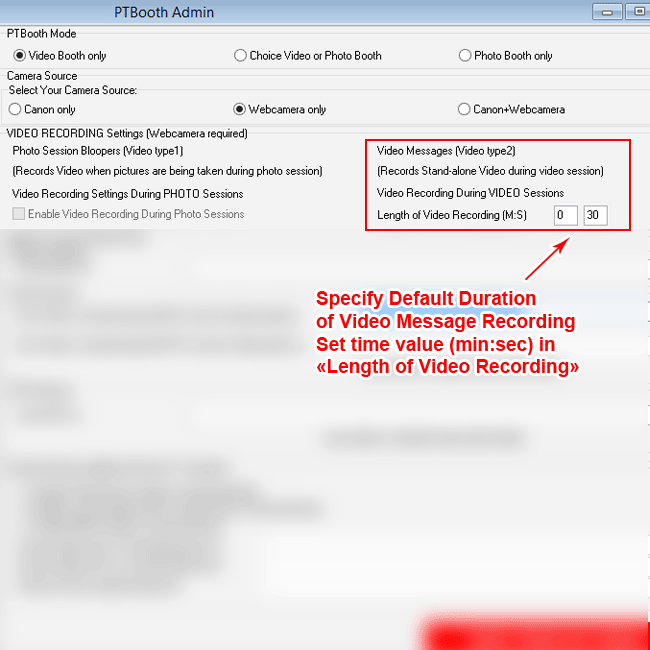
Specify Video Recording Time values
Specify the location on your computer where you want to store videos Click Save Your Settings
By default the Desktop is pre-determined location to save videos. You can change the default location if needed.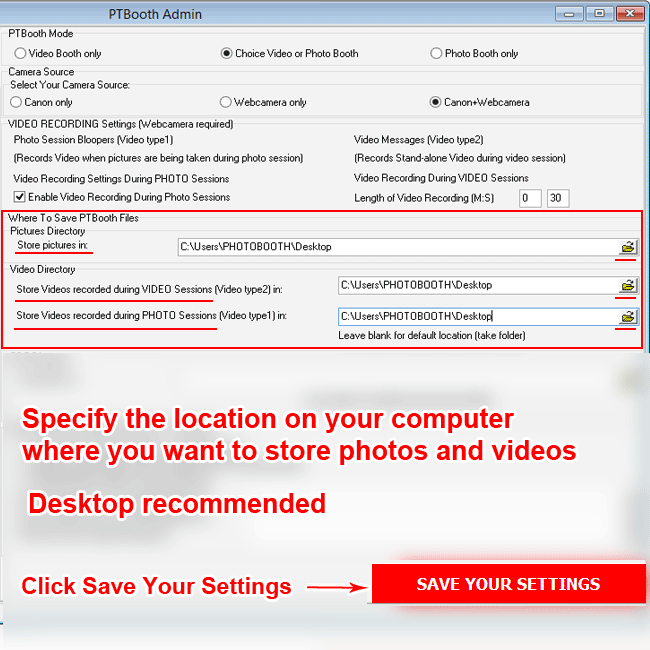
Setting up VIDEO RECORDING Settings
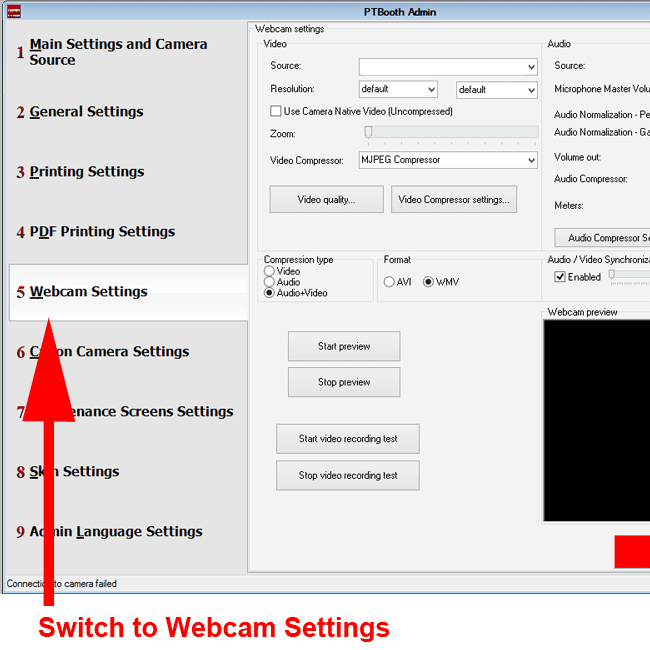
Switch to the Webcam Settings Tab
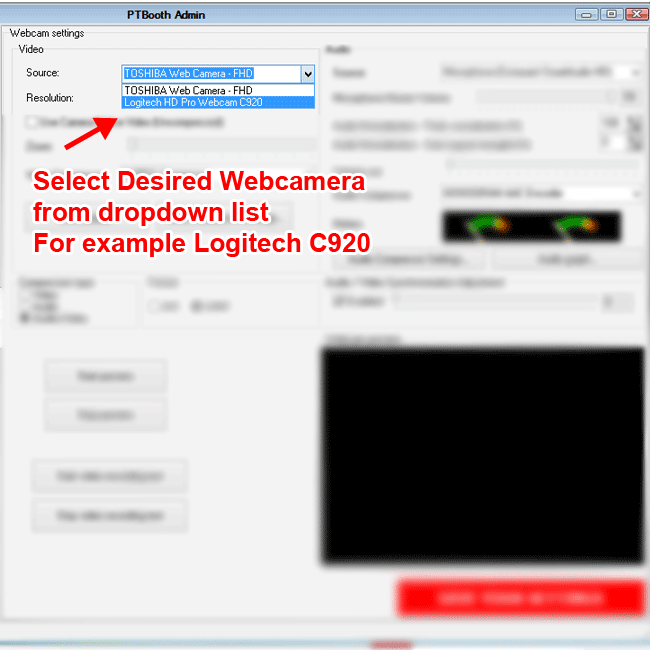
Choose the desired webcam from the dropdown list
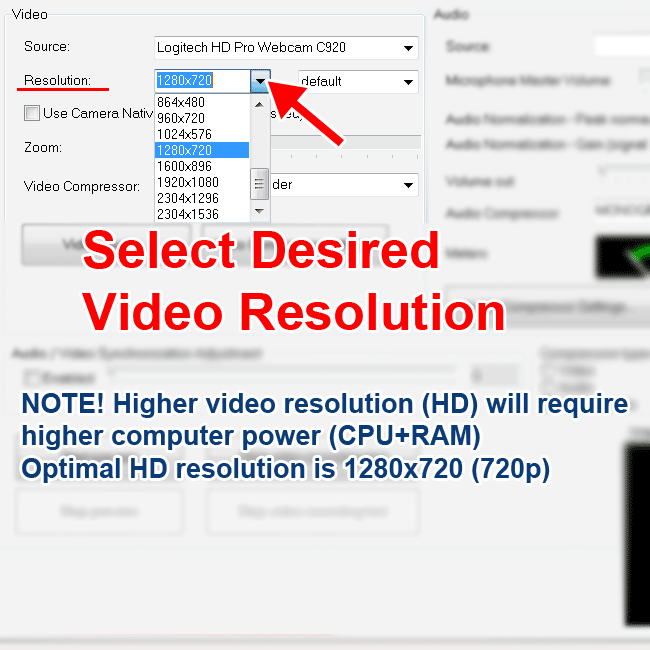
Set the desired Video Resolution
Choose Your Video Compression: "Camera Native Video" OR System Video Compressor
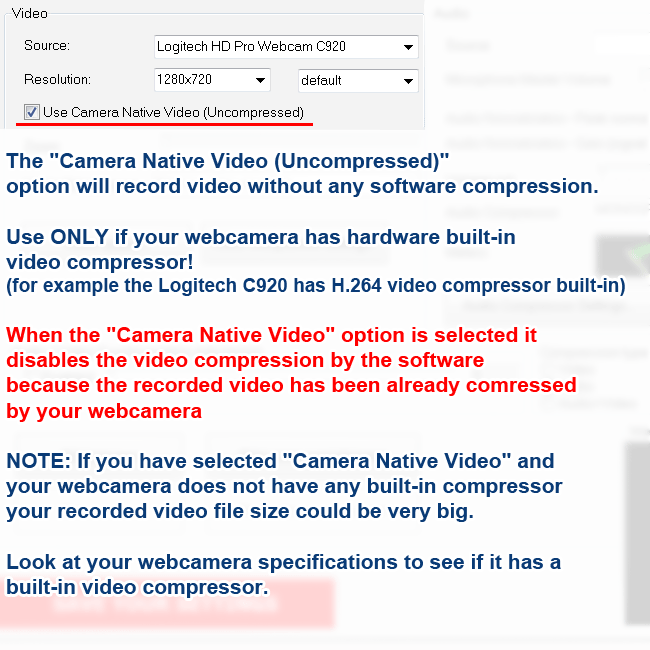
Camera Native Video (Uncompressed) Option
The "Camera Native Video (Uncompressed)" option records video without software compression.
WHEN TO USE "Camera Native Video (Uncompressed)"?
Use it if your webcamera has hardware built-in video compressor!
(for example the Logitech C920 has H.264 video compressor built-in)
When the "Camera Native Video" option is selected it disables the video compression by the software because the recorded video has been already comressed by your webcamera
NOTE: If you have selected "Camera Native Video (Uncompressed)" and your webcamera does not have any built-in compressor your recorded video file size could be very big. Look at your webcamera specifications to see if it has a built-in video compressor.
System Video Compressor Option
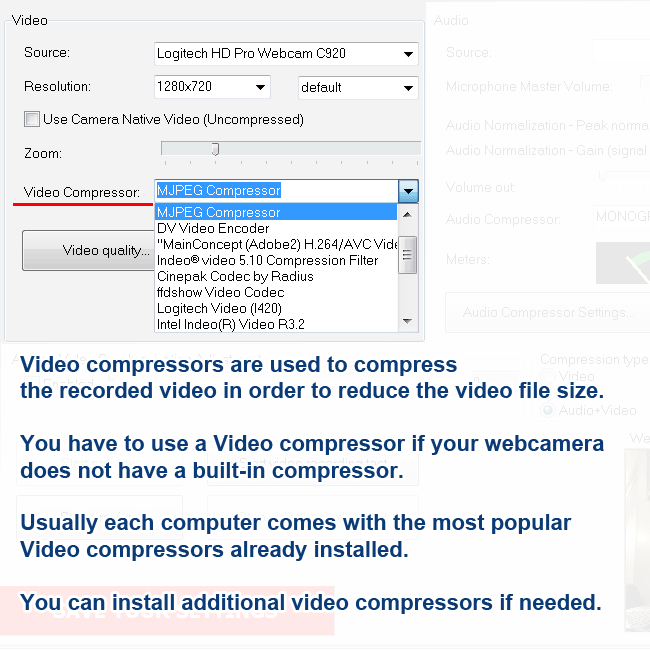
Video compressors are used to compress the recorded video in order to reduce the video file size.
WHEN TO USE System Video Compressor Option?
You have to use a Video compressor if your webcamera does not have a built-in compressor.
PTBooth will let you choose one of the Video compressors that are available on your computer and will use it to process recorded video.
Usually each computer comes with the most popular Video compressors already installed.
However you are not limited to the Video compressors already installed in your system.
There are a lot of Video compressors available for download from third party developers that you can install on your computer.
It is a choice of personal preferenceses when it comes to which Video compressor to use.
You need to run a few test recordings and determine what Video compressor satisfies your needs.
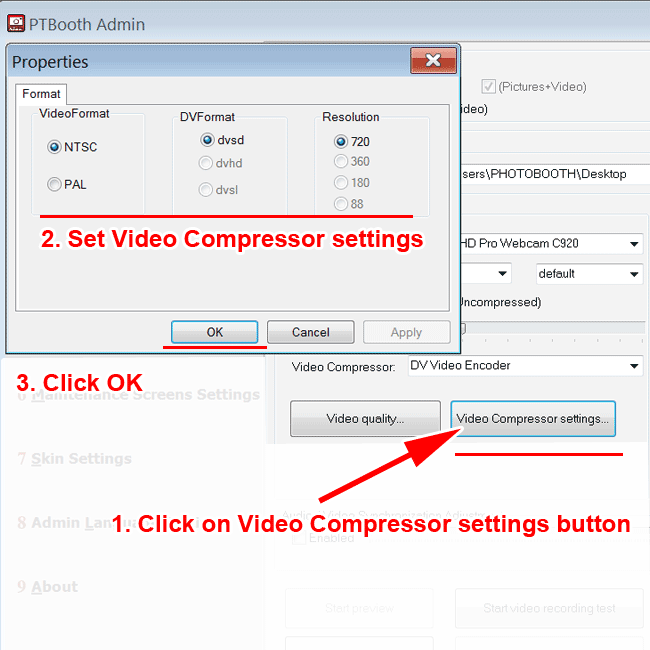
Set the additional Video compressor settings if needed
Some Video Compressors have additional settings available, follow the steps if you wish to use these settings.
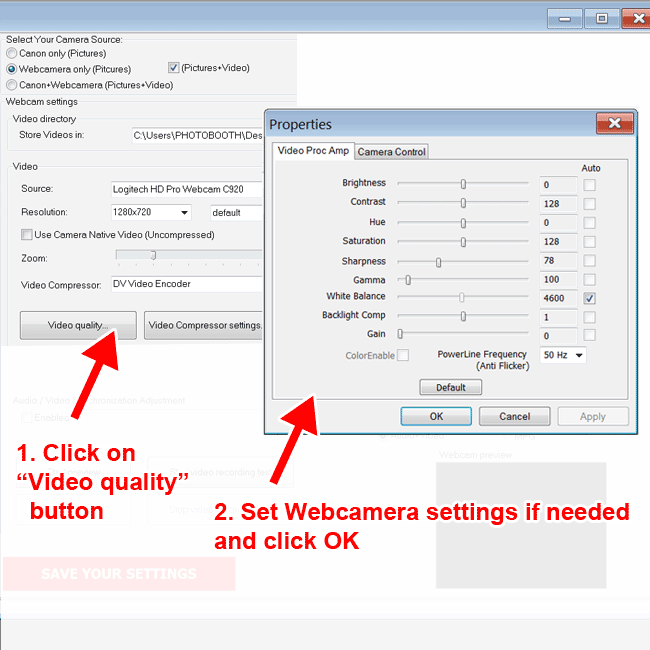
Set the additional Webcamera settings if needed
Webcameras have additional settings available, follow the steps if you wish to use these settings.
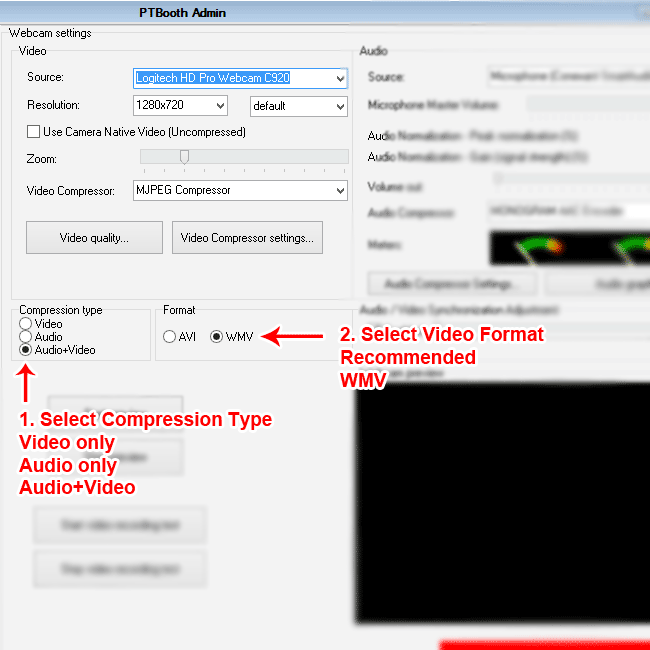
Set the Compression type and Video format
You can tell the PTBooth what needs to be compressed (Audio only, Video only, Audio+Video) and in what video format the recorded video should be saved (avi, wmv).
NOTE: When "Camera Native Video" option is selected the Compression type will be pre-selected automatically.
We recommend WMV format that creates quality video with a small file size.
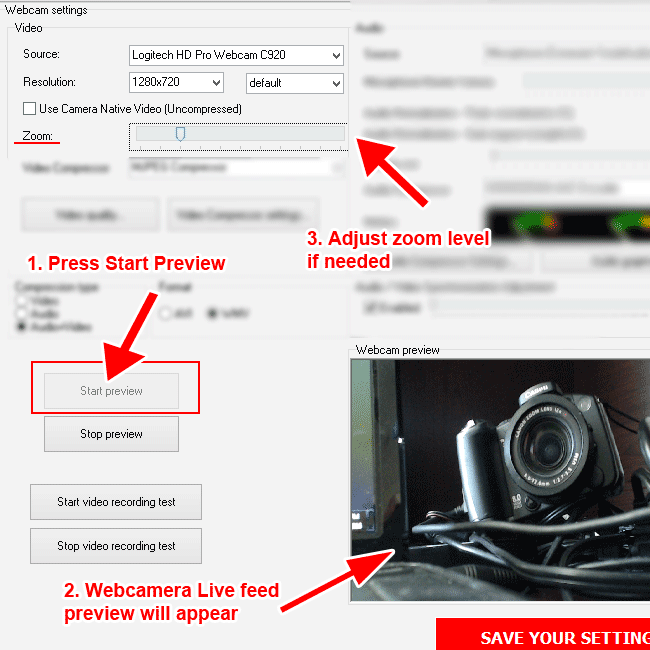
Press "Start Preview" and adjust the zoom level if needed
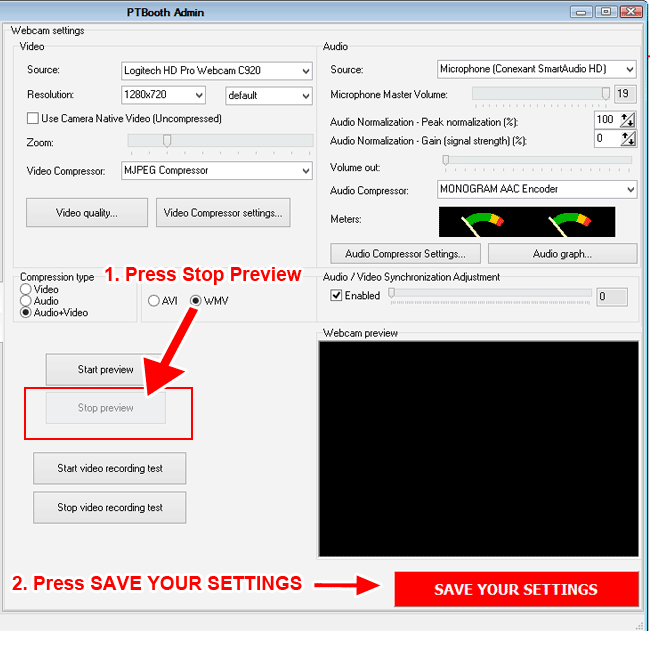
Press "Stop Preview" and then "Save Your Settings"
Setting up AUDIO settings
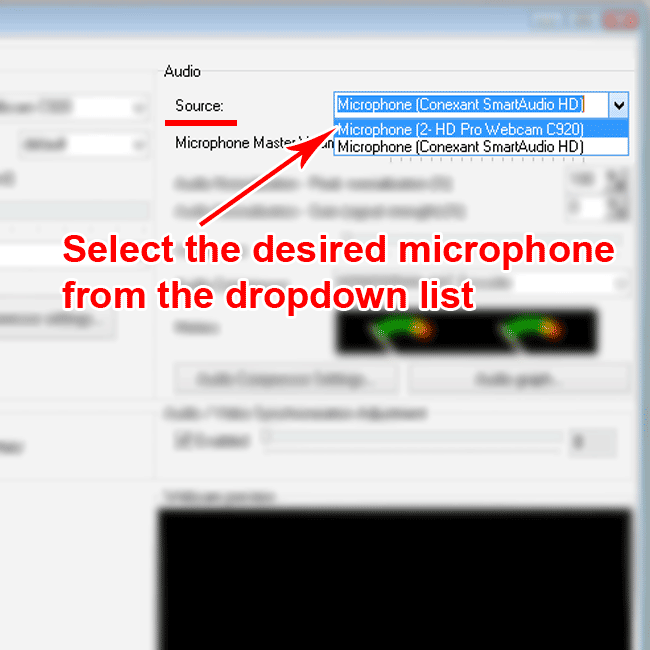
Select the desired microphone from the dropdown list
Usually the webcamera microphone is used to record audio. But if you wish you can also use any external microphone that your computer wil recognize.
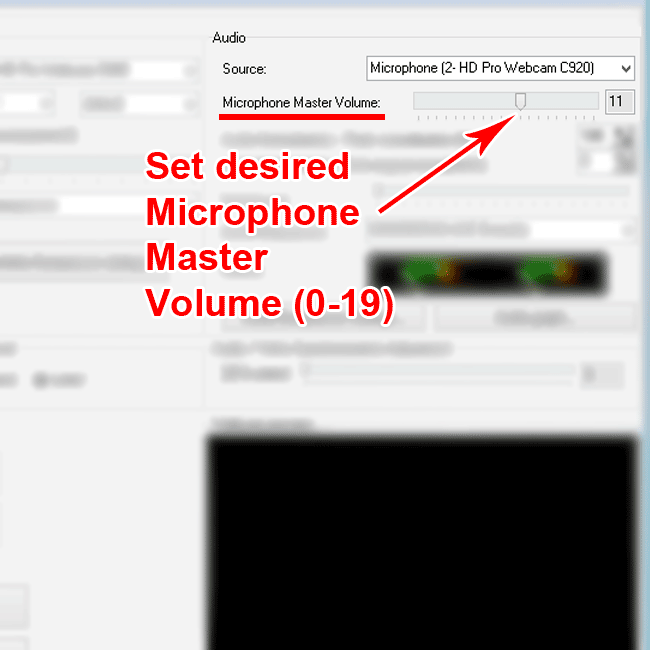
Set desired Microphone Master Volume (0-19)
Microphone Master Volume defines the level of loudness of incoming audio that will be recorded.
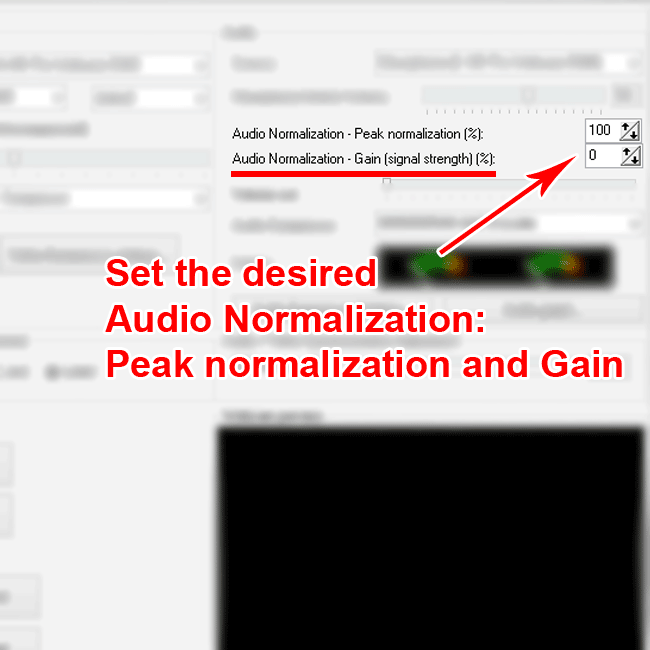
Set the desired Audio Normalization: Peak normalization and Gain
Use the default values at the begining.
Audio Normalization (Peak normalization and Gain) are acting as a "Safe Guard" by preventing audio distortion.
Peak normalization: reduces the initial Microphone Master Volume to the point when sound is not distorted if you will have an abrupt increase of the incoming audio signal.
Gain: Gain (signal strength) is enhancing the Microphone Master Volume by regulating the overall loudness and keeping the Microphone Master Volume above the Gain values.
Audio Normalization values can be determined at the location by looking at Audio graph and listening to the recorded test clip
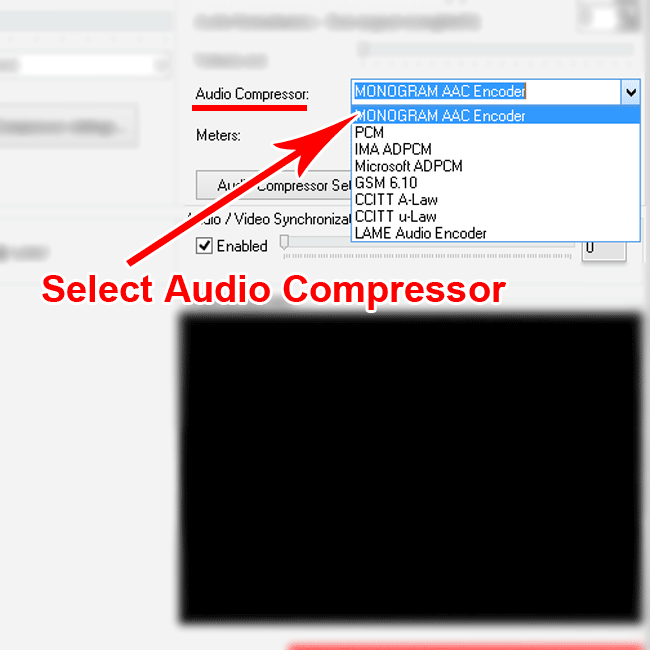
Select Audio Compressor
PTBooth will let you choose one of the Audio compressors that are available on your computer and will use it to process recorded video.
Usually each computer comes with the most popular Audio compressors already installed.
However you are not limited to the Audio compressors already installed in your system.
There are a lot of Audio compressors available for download from third party developers that you can install on your computer.
It is a choice of personal preferenceses when it comes to which Audio compressor to use. You need to run a few test recordings and determine what Audio compressor satisfies your needs.
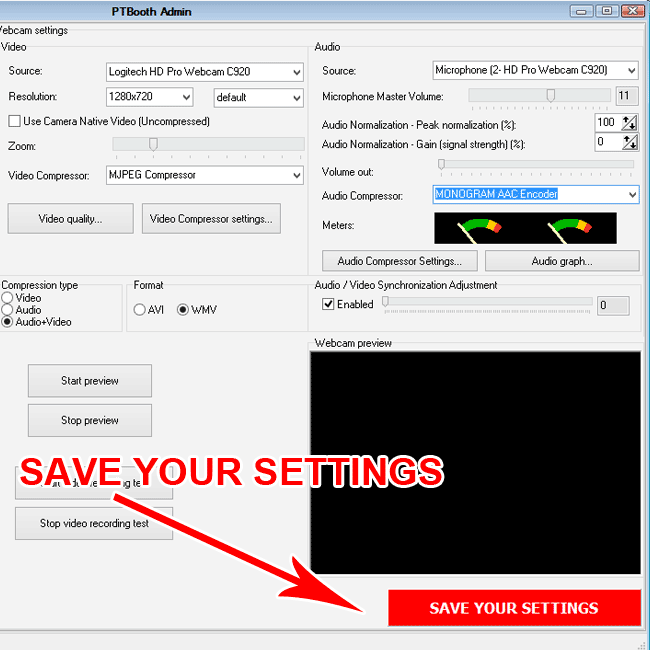
Save your settings
After all your desired Audio settings are set make sure you press "Save Your Settings" button
Perform Video Recording Test (IMPORTANT)
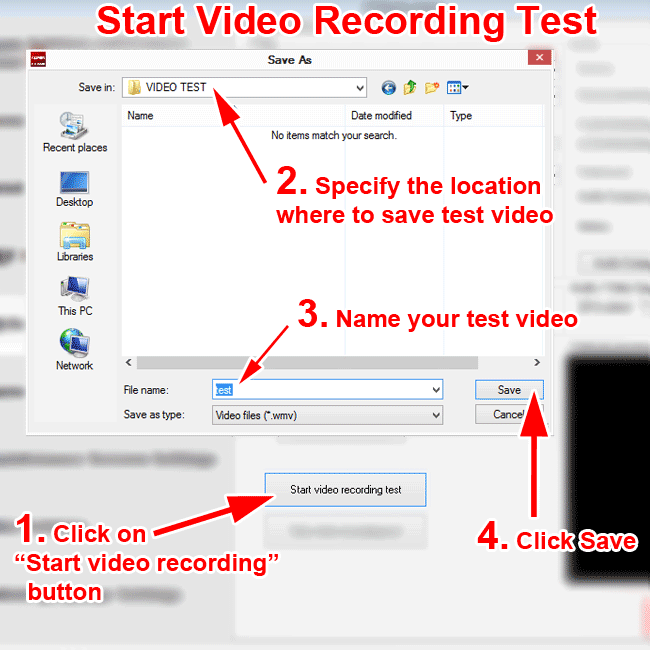
Start Video Recording Test
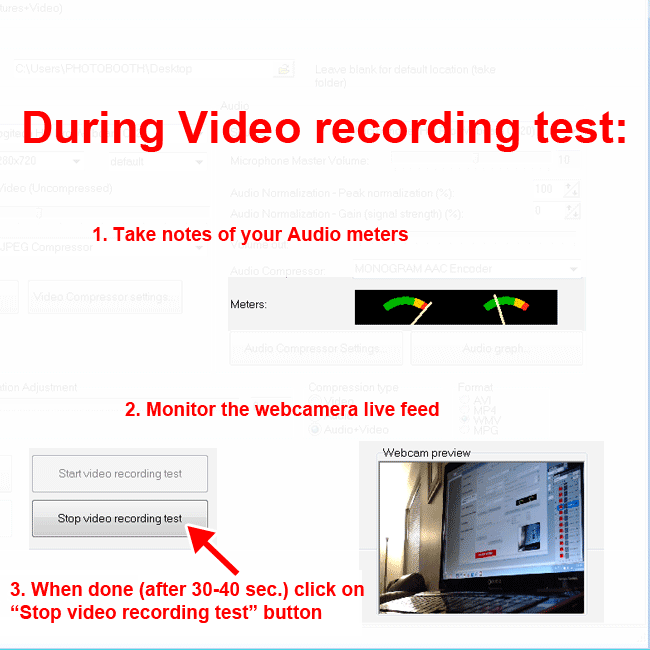
To be sure what video your webcamera will record it is recommended to perform a Video recording test.
Usually 30-40 seconds is enough for the test video.
1. Click on "Start video recording" button,
2. Specify the location on your computer where you want to save the test video,
3. Name your test video,
4. Click save, Video recording will begin.
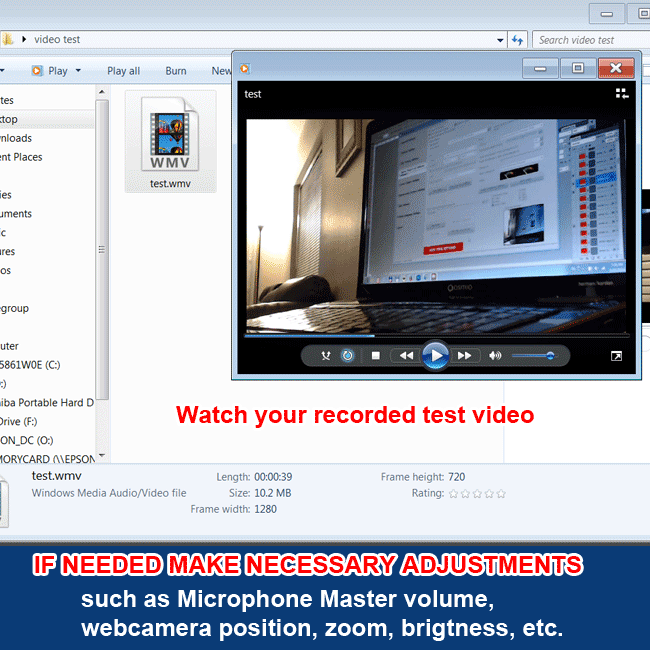
Monitor your audio levels and webcam preview during the Video recording test
Examine your recorded test Video by Watchng and Listening closely
Examine your recorded test Video by Watchng and Listening closely and if necessary make any adjustments that you wish (webcamera position, zoom, microphone master level, etc.)
