About Default Print Templates in PTBooth A1 PLUS
With PTBooth A1 PLUS we have included 23 Pre-designed landscape and portrait print templates that can be used right after the installation
The Default Print Templates have different layouts and media size to choose from (Portrait, Lanscape, Photostrip, 4x6, 6x8).
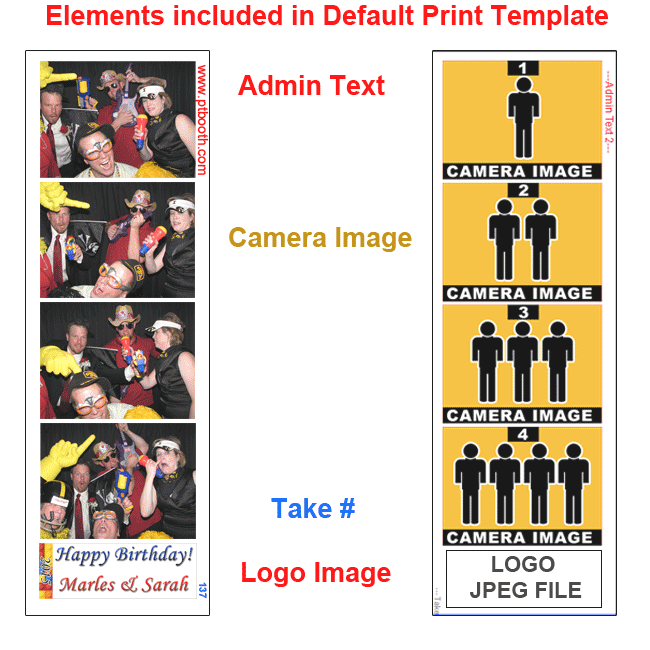
Each Default Print Templates layout consist of the following elements:
Camera photos, Logos, Admin text, Take#
You can Modify the Default Print Template
Modifying the Default Print Templates
Open the PTBooth Print Template Creator
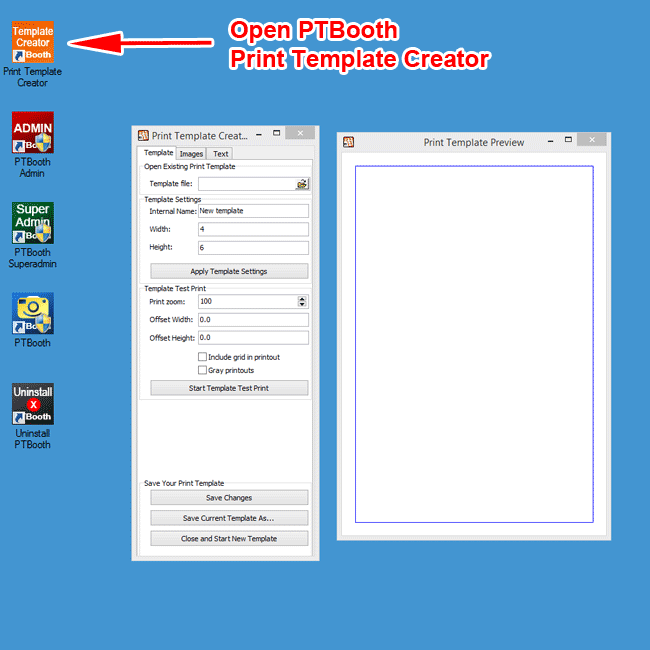
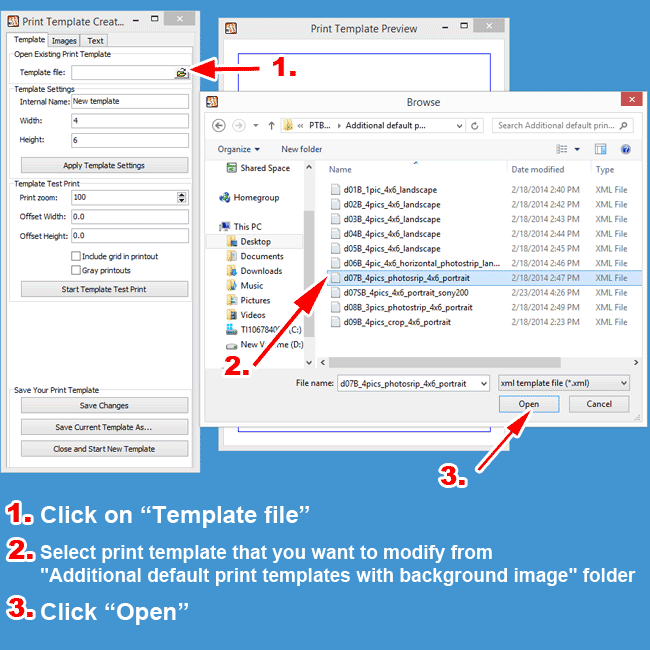
Next, open the Print Template that you want to modify
In the Template Tab click on the folder icon in the "Template File" field.
You will see a "Browse" window will open.
Locate the "Additional default print templates with background image" folder in your Downloaded PTBooth A1 package.
Once inside the folder, select the Default Print Template that you want to modify.
Click "Open"
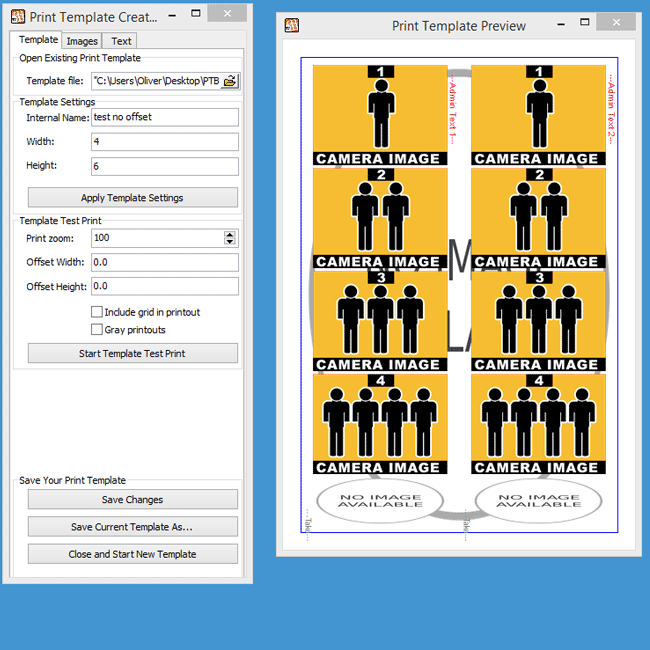
The Selected Print Template preview will appear in the Print Template Preview window
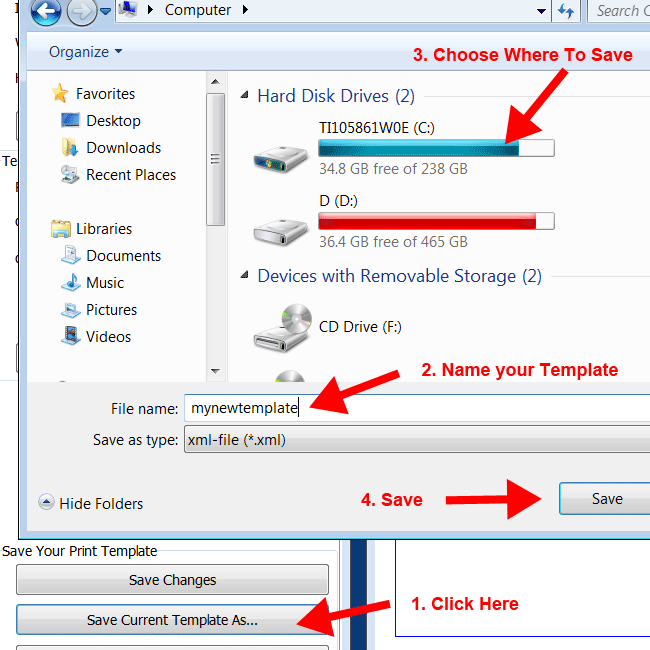
Save Your Print Template as a new template
In the Teplate Tab click on the "Save Current Template As..." button.
You will see a "Save As" window appear.
Next, name your Print Template and choose the location on your computer where you want to save your Print Template.
Click "Save"
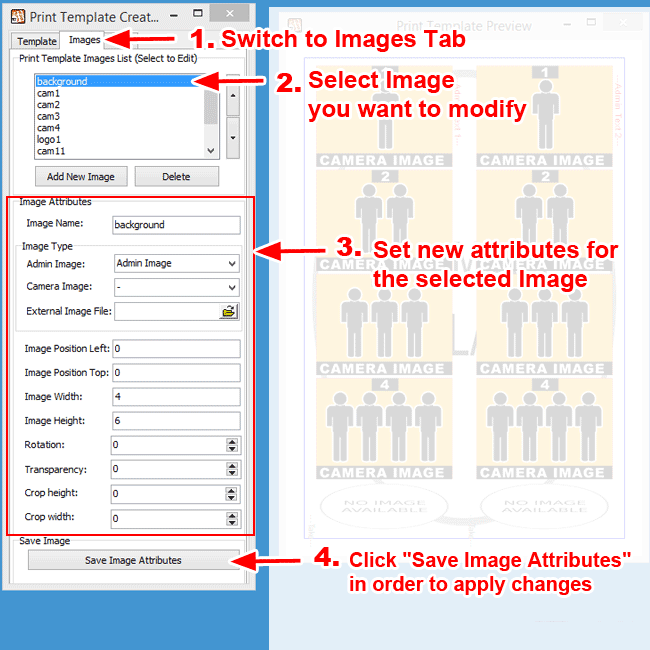
Modifying Images in the Print Template
Switch to the "Images" Tab
Select the image that you want to modify from the "Print Template Images List" box.
Next, enter the new image attributes.
Click "Save Image Attributes" button to apply the changes.
Modifying Text elements in Print Template
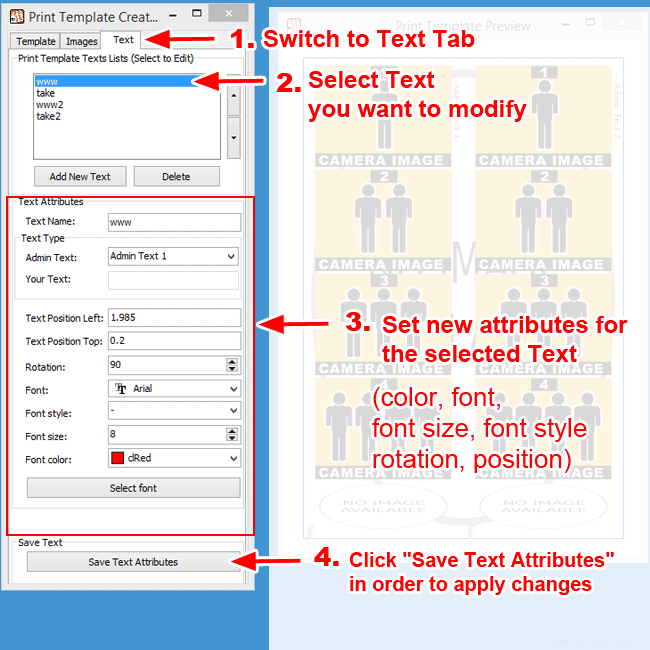
Switch to the "Text" Tab
Select the text element that you want to modify from the "Print Template Texts List" box.
Next, enter the new text attributes.
Click "Save Text Attributes" button to apply changes.
Save Your New Template
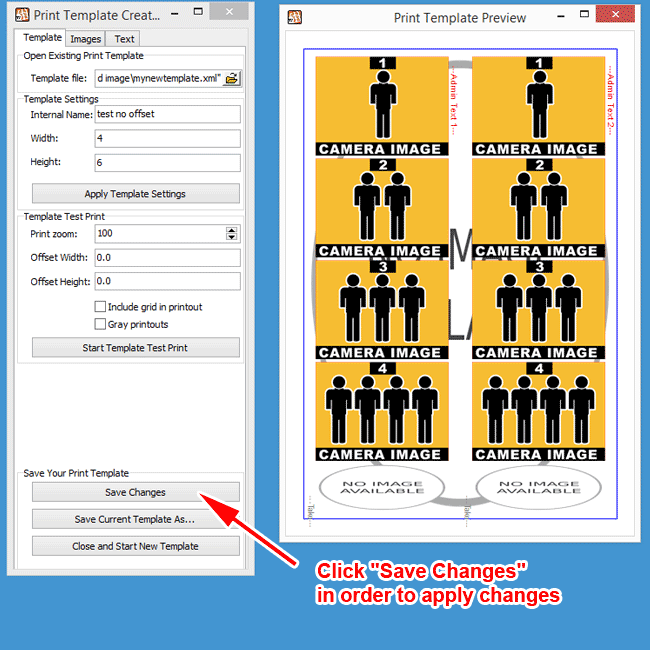
After you have made all of the necessary changes you will need to save the template in order for it to be applied.
Switch to the TEMPLATE TAB and click "Save Changes"
The Print Template is now Modified and is ready to be used.
Install Your New Modified Print Template in PTBooth Admin.
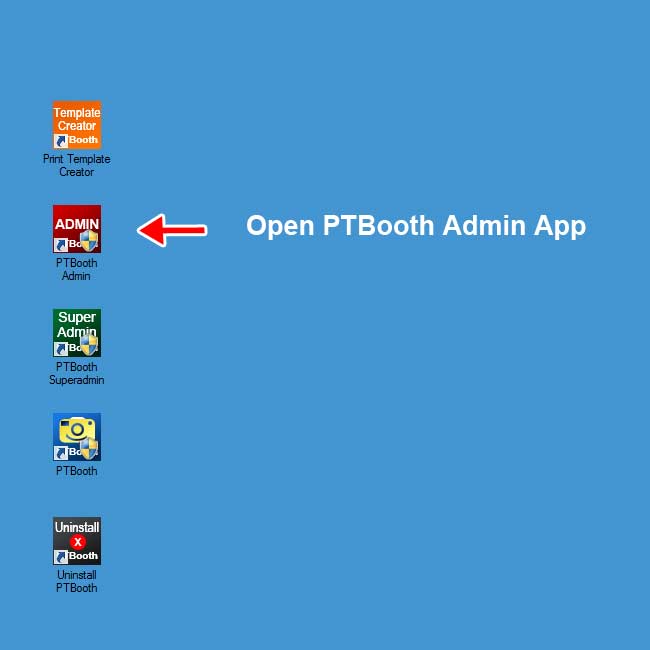
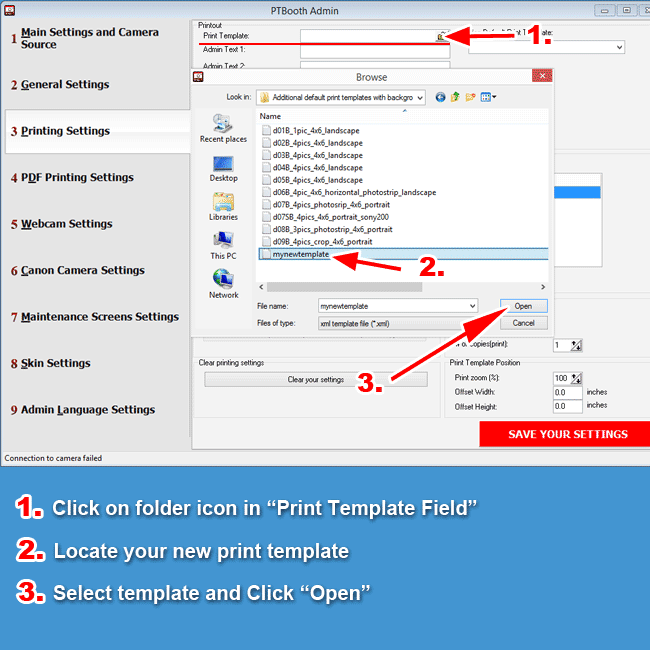
Open the PTBooth Admin
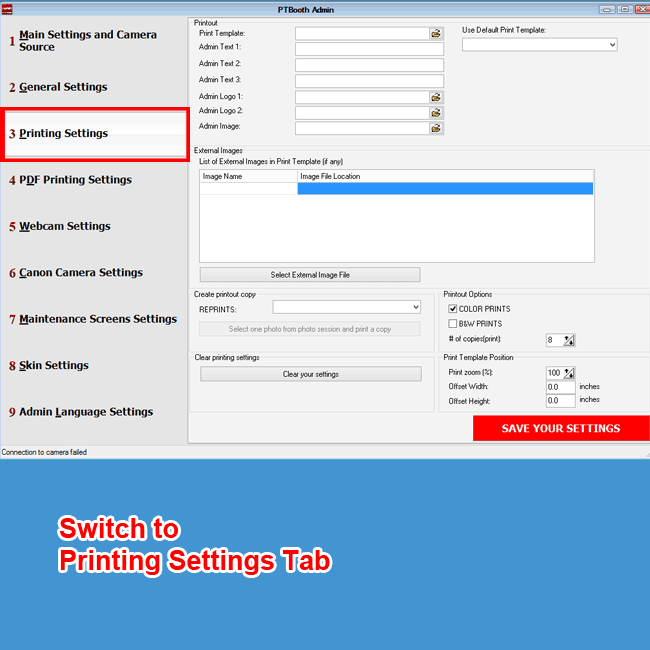
Switch to the Printing Settings Tab
Select your new Modified Print Template
1. In PTBooth Admin click on folder icon in "Print Template" field
2. Find the location where you saved your new print template
3. Select the template and click "Open"
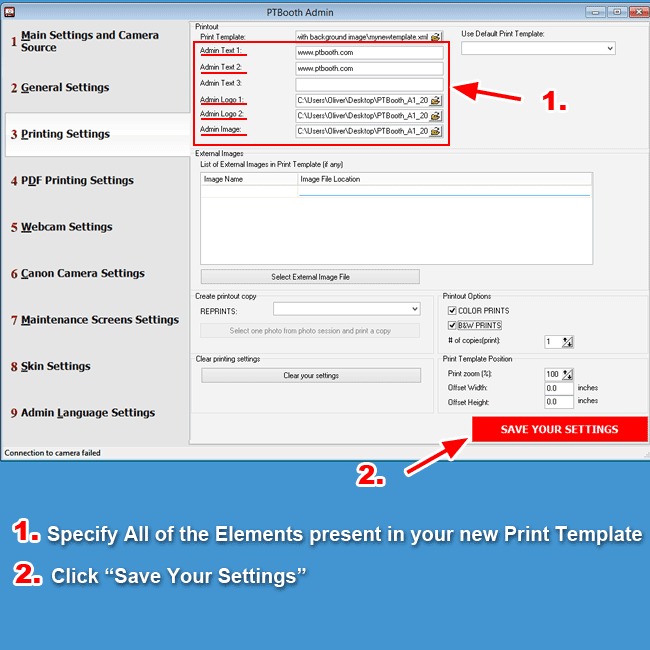
Specify All the Elements present in your new Print Template
Each Print Template has required elements such as Logo, Admin text, background image etc.
After all of the elements are in place click "Save Your Settings"
